

Rice Krispie Hearts: 5 Sweet Ways to Celebrate Love
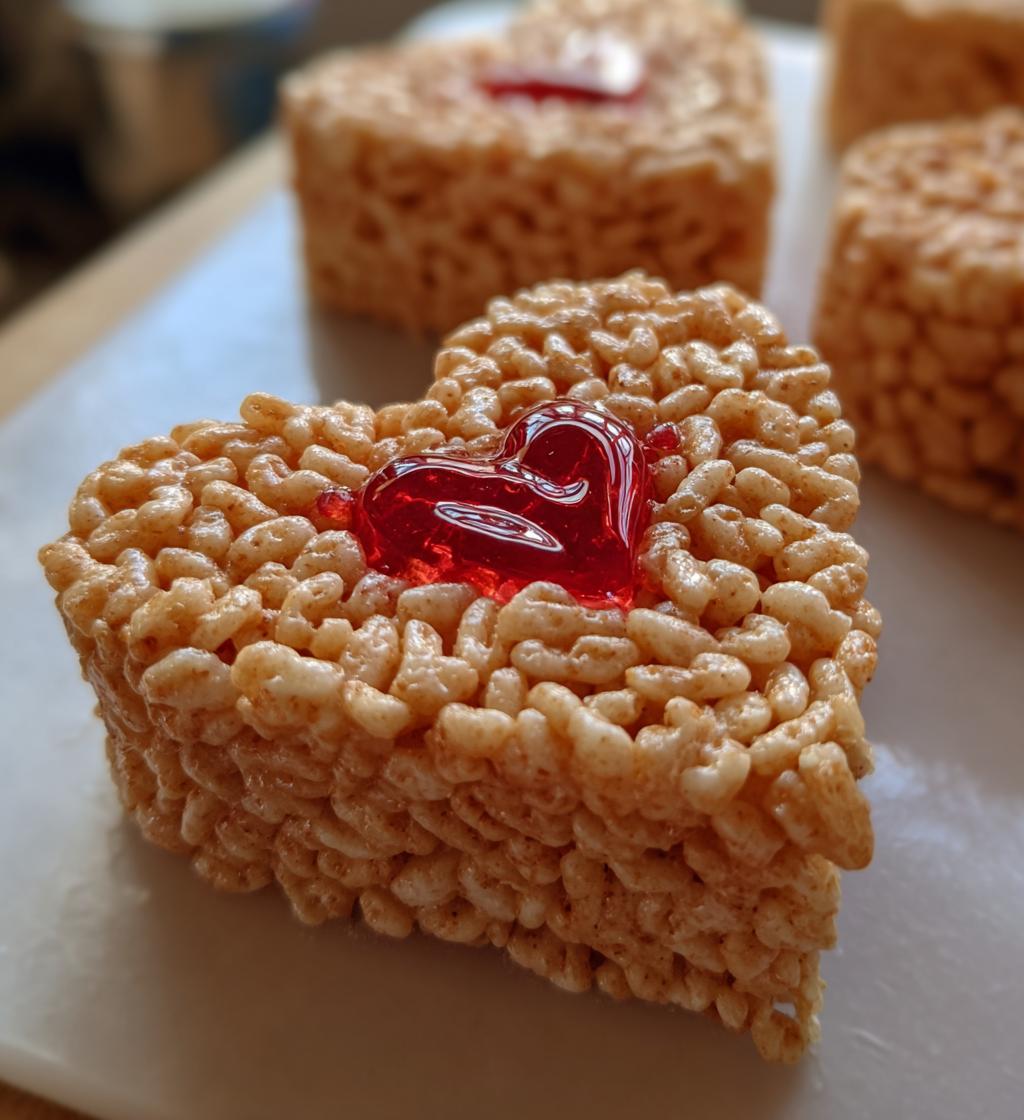
Oh my goodness, have you ever made Rice Krispie Hearts? They’re not just a treat; they’re a celebration wrapped in sweetness! I remember the first time I made these for a Valentine’s Day party. My kitchen was filled with laughter as my kids helped shape the gooey mixture into hearts, and trust me, their faces lit up with joy when they saw the vibrant red color. It’s such a simple no-bake recipe, yet it brings everyone together—kids and adults alike! The best part? You can customize them with sprinkles or different colors for any occasion. Whether it’s a birthday, holiday, or just a fun rainy day, these adorable little hearts are sure to bring smiles and sweet memories. So, let’s dive into this delightful creation that’s as fun to make as it is to eat!
Ingredients List
- 3 tablespoons butter (unsalted)
- 1 package (10 oz) marshmallows (mini or regular)
- 6 cups Rice Krispies cereal
- Red food coloring (to desired shade)
- Sprinkles (optional for decoration)
How to Prepare Rice Krispie Hearts
Making Rice Krispie Hearts is such a breeze, and I’m here to walk you through it step by step! Trust me, you’ll be amazed at how quickly these little delights come together. Ready? Let’s get started!
Step-by-Step Instructions
- First, grab a large saucepan and melt the butter over low heat. This should take about 2 minutes. Just keep stirring until it’s totally melted—no one likes burnt butter!
- Next, add in the marshmallows. Keep stirring until they’re completely melted and smooth. This is the part where you really want to make sure there are no lumps—about 3-4 minutes should do the trick!
- Once the marshmallows are all gooey and luscious, it’s time to add the red food coloring. Start with a few drops and mix it in until you reach your desired shade of red. Isn’t it beautiful?
- Now, remove the saucepan from the heat and gently fold in the Rice Krispies. Make sure every little piece is coated well; this is key to getting that perfect texture. Use a spatula or wooden spoon, and it’ll take about a minute or so.
- Next, you’ll want to press the mixture into a greased heart-shaped mold. Don’t be shy—use your hands or the back of a spatula to really pack it in. Make sure it’s even and smooth!
- Let the hearts cool for at least 30 minutes at room temperature. Once they’re set, pop them out of the mold. If you’re feeling fancy, sprinkle some sprinkles on top before serving!
And there you have it—delicious Rice Krispie Hearts ready to be enjoyed! Just remember, the key is to be gentle when mixing and pressing, and you’ll nail it every time!
Why You’ll Love This Recipe
- Quick and easy to prepare—perfect for when you need a sweet treat in a hurry!
- Ideal for celebrations and holidays, adding a fun twist to your dessert table.
- Customizable with colors and toppings, so you can create unique designs for any occasion.
- A fun activity for kids to join in—let them help shape the hearts and decorate with sprinkles!
Tips for Success
To make sure your Rice Krispie Hearts turn out perfectly every time, I’ve got some handy tips for you! Trust me, these little details can make all the difference.
- Grease that mold: Make sure to generously grease your heart-shaped mold before adding the mixture. This will help the hearts pop out easily without any sticky drama!
- Mix colors carefully: When adding food coloring, start with just a few drops. You can always add more if you want a deeper shade, but it’s tough to take it away if you go too far! Mix thoroughly to avoid streaks.
- Don’t rush the melting: Be patient while melting the butter and marshmallows. If you go too fast, it could burn or clump. Keep the heat low and stir consistently—that’s the key!
- Pack it in: When you press the mixture into the mold, really pack it down. The more packed it is, the better your hearts will hold their shape when you pop them out.
- Let them set: Give your hearts enough time to cool and set properly. I know it’s tempting to dig in right away, but letting them rest for at least 30 minutes helps them firm up nicely!
With these tips, you’ll be a Rice Krispie Heart pro in no time! Enjoy the process and have fun decorating these sweet little treats.
Serving Suggestions
Oh wow, the possibilities for serving Rice Krispie Hearts are endless! These adorable treats are perfect for all sorts of occasions. Imagine bringing them to a Valentine’s Day party or a birthday bash; they’ll steal the show for sure! You can also whip them up for school events or just a fun afternoon snack at home.
If you want to really wow your guests, try pairing these hearts with a scoop of vanilla ice cream. The creamy ice cream contrasts beautifully with the sweet and crispy hearts, creating a delightful combination. Or serve them alongside a colorful fruit platter—think strawberries, blueberries, and kiwi slices. The fresh fruit adds a refreshing touch and makes your dessert table look vibrant and inviting!
Also, consider using these Rice Krispie Hearts as a decorative centerpiece on your dessert table. Stack them up high or place them on a decorative plate and watch everyone gather around! You can even drizzle some melted chocolate over the top for an extra special touch. Trust me, your family and friends will love how fun and festive these little hearts can be!
Storage & Reheating Instructions
Storing your Rice Krispie Hearts is super easy, and they’ll stay fresh for days! Just make sure to keep them in an airtight container at room temperature. This will help maintain their delightful crunchiness and prevent them from getting stale. I like to layer them between sheets of parchment paper to keep them from sticking together—trust me, it makes a difference!
If you’re planning to make these adorable hearts a day in advance, go for it! They actually taste just as good the next day, which is a huge win when you’re prepping for a party or special occasion. Just be sure to let them cool completely before storing, so they don’t trap any moisture inside the container.
Oh, and reheating? There’s really no need! These treats are best enjoyed at room temperature, and they’ll stay perfectly sweet and crispy just the way they are. If you find yourself with leftovers (which is rare, but hey, it could happen!), just pop them back in the container, and you’re all set for another day of deliciousness!
Nutritional Information
Alright, let’s chat about the nutritional information for these delightful Rice Krispie Hearts! It’s always nice to know what you’re indulging in, right? Here’s a quick breakdown of the estimated values:
- Serving Size: 1 heart
- Calories: 150
- Sugar: 12g
- Sodium: 80mg
- Fat: 5g
Keep in mind, these values are estimates and can vary based on the brands of ingredients you use. So, if you’re counting calories or just curious about your treats, it’s a fun little fact to consider. But hey, life’s too short not to enjoy a sweet Rice Krispie Heart every now and then, right? Treat yourself!
FAQ Section
Can I use different colors for the hearts?
Absolutely! You can use any color food coloring you like to create fun and festive Rice Krispie Hearts. Just remember to start with a few drops and mix until you achieve your desired shade. It’s a great way to match them to any occasion!
How long do they last?
When stored in an airtight container at room temperature, your Rice Krispie Hearts will stay fresh for about 3-5 days. Just make sure they’re completely cool before sealing them up to keep them crunchy!
Can I make them without food coloring?
Definitely! If you prefer, you can skip the food coloring altogether. The Rice Krispie Hearts will still taste amazing and have that classic marshmallow flavor that everyone loves!
What can I use instead of a heart-shaped mold?
No heart-shaped mold? No problem! You can use any baking dish or even a cookie sheet. Just press the mixture down flat and cut them into hearts once they’re set using a cookie cutter or knife!
Can I add mix-ins to the Rice Krispie mixture?
Absolutely! Feel free to get creative by adding mini chocolate chips, nuts, or even dried fruit to the mixture before pressing it into the mold. Just make sure not to overload it so the hearts hold their shape!

Rice Krispie Hearts: 5 Sweet Ways to Celebrate Love
- Total Time: 15 minutes
- Yield: 12 hearts 1x
- Diet: Vegetarian
Description
A fun and tasty treat shaped like hearts using Rice Krispies.
Ingredients
- 3 tablespoons butter
- 1 package (10 oz) marshmallows
- 6 cups Rice Krispies cereal
- Red food coloring
- Sprinkles (optional)
Instructions
- Melt the butter in a large saucepan over low heat.
- Add marshmallows and stir until completely melted.
- Mix in red food coloring until desired color is achieved.
- Remove from heat and stir in Rice Krispies until well coated.
- Press the mixture into a greased heart-shaped mold.
- Allow to cool and set before removing from the mold.
- Top with sprinkles if desired.
Notes
- Store in an airtight container.
- Can be made a day in advance.
- Use different colors for various occasions.
- Prep Time: 10 minutes
- Cook Time: 5 minutes
- Category: Dessert
- Method: No-bake
- Cuisine: American
Nutrition
- Serving Size: 1 heart
- Calories: 150
- Sugar: 12g
- Sodium: 80mg
- Fat: 5g
- Saturated Fat: 3g
- Unsaturated Fat: 1g
- Trans Fat: 0g
- Carbohydrates: 24g
- Fiber: 0g
- Protein: 1g
- Cholesterol: 15mg
Keywords: Rice Krispie Hearts, dessert, no-bake treat


