

Kunafa Chocolate Icebox Cake: 7 Steps to Pure Delight
Oh my goodness, let me tell you about this Kunafa Chocolate Icebox Cake! This dessert is an absolute showstopper, and trust me when I say, it’s a breeze to whip up. I remember the first time I made it; I was hosting a little gathering and wanted something that would wow my friends without keeping me in the kitchen all day. The combination of the crispy, buttery Kunafa pastry and the rich, creamy chocolate filling is just heavenly! It’s like a party in your mouth, and the best part? You don’t even have to turn on the oven for the filling!
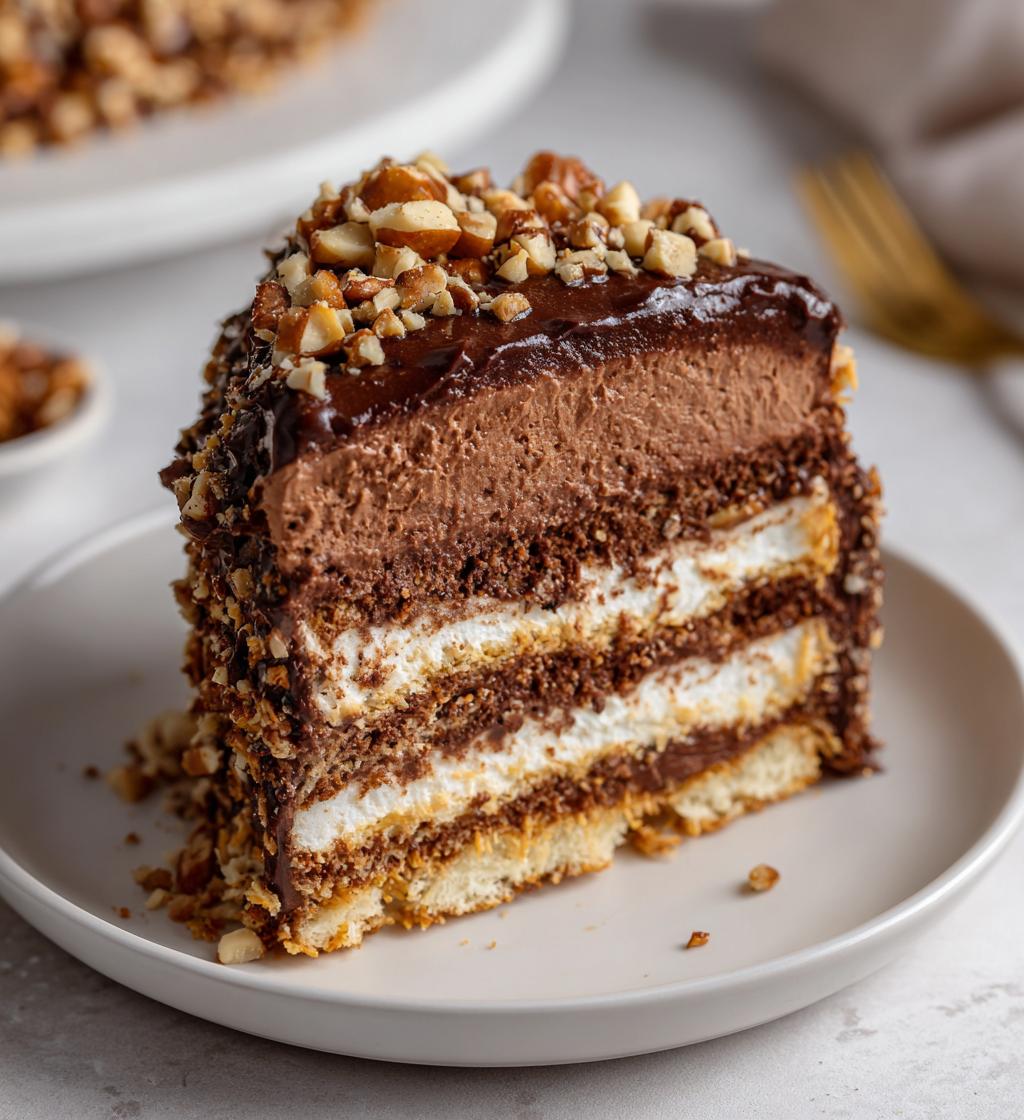
As I layered the chocolate mixture over the cooled Kunafa base, I couldn’t help but feel excited about how easy and delicious this would turn out. Plus, it’s a no-bake dessert, which means less fuss and more time to enjoy with loved ones. The way it chills in the fridge, allowing all those flavors to meld together, is pure magic. Seriously, the anticipation while waiting is almost unbearable, but totally worth it when you take that first bite! Whether it’s for a special occasion or just a weeknight treat, this Kunafa Chocolate Icebox Cake is sure to impress. Let’s dive into how to make this delightful dessert together!
Ingredients List
- 200g Kunafa pastry
- 100g unsalted butter, melted
- 400g cream cheese, softened
- 200g powdered sugar
- 300ml whipping cream
- 200g dark chocolate, melted
- 1 tsp vanilla extract
- 100g chopped nuts for topping
How to Prepare Kunafa Chocolate Icebox Cake
Alright, let’s get down to the fun part—making this delicious Kunafa Chocolate Icebox Cake! I promise, once you start, you’ll wonder why you ever waited to try it. Just follow these steps, and you’ll have a show-stopping dessert ready in no time!
Step-by-Step Instructions
- First things first, preheat your oven to 180°C (350°F). This way, we’re all set to get that lovely Kunafa base crispy and golden!
- Grab your Kunafa pastry and mix it with the melted butter in a bowl. You want to make sure every little strand is coated. It’s like giving your pastry a warm hug!
- Now, press that buttery Kunafa mixture into the bottom of a springform pan. Use your fingers or the back of a spoon to really pack it in there. We want a nice, solid base that’s going to hold all that creamy goodness.
- Pop the pan in the oven and bake for about 10-12 minutes, or until it turns a beautiful golden brown. The aroma while it bakes is simply divine—I can’t even tell you how tempting it is!
- Once it’s out, let the Kunafa cool completely. This is crucial, as we don’t want to melt our chocolate filling with a hot base.
- While that cools, let’s make the filling! In a large bowl, beat the softened cream cheese and powdered sugar together until it’s smooth and creamy. You want it to be fluffy and delightful—just like a cloud!
- In another bowl, whip the cream until stiff peaks form. This means it should hold its shape when you lift the whisk out. It’s a bit of an arm workout, but oh-so-worth it!
- Carefully fold the whipped cream into the cream cheese mixture. Take your time here; you want to keep that lovely lightness in the filling!
- Now, it’s time for the star of the show—add the melted dark chocolate and the vanilla extract into the mix. Stir gently until everything is well combined. You’ll be tempted to taste it at this point, and trust me, you won’t regret it!
- Spread that luscious chocolate mixture evenly over the cooled Kunafa base. Just look at that glorious layer; it’s already calling your name!
- Finally, cover the cake with plastic wrap and chill it in the refrigerator for at least 4 hours. I know waiting is the hardest part, but this is where all those flavors come together beautifully.
- When you’re ready to serve, sprinkle the chopped nuts on top for a little crunch and extra flair. Wow, just wow!
And there you have it! Your Kunafa Chocolate Icebox Cake is ready to be devoured. I can’t wait for you to try it—it’s a real treat that’s sure to impress anyone lucky enough to get a slice!
Why You’ll Love This Recipe
- It’s a quick and easy no-bake dessert—perfect for any occasion!
- The combination of crispy Kunafa and rich chocolate is simply irresistible.
- You’ll impress your friends and family without spending hours in the kitchen.
- Chilling it allows all those flavors to meld together beautifully, enhancing the taste.
- It’s a versatile dessert; you can easily customize the toppings to your liking!
- Perfectly creamy and decadent, yet light enough for any sweet tooth.
- Great for sharing, making it a fun treat for gatherings or celebrations.
Tips for Success
Alright, my fellow dessert lovers, let’s make sure your Kunafa Chocolate Icebox Cake turns out absolutely perfect! Here are some tips that I swear by:
- Kunafa Pastry: If you can, opt for store-bought Kunafa for convenience. Just make sure it’s fresh! If you’re feeling adventurous, you can make it from scratch, but I promise, the store-bought version is just as good for this recipe.
- Melting Chocolate: When you melt the dark chocolate, do it slowly! I recommend using a double boiler or microwaving in short bursts (about 20 seconds at a time) and stirring in between. This helps prevent any pesky lumps.
- Whipping Cream: For the whipped cream, make sure your bowl and beaters are cold—it makes a world of difference in achieving those stiff peaks! Pop them in the fridge for a bit before you whip.
- Customizing Flavors: Feel free to play around with flavors! You can add a splash of almond extract instead of vanilla or even mix in some orange zest for a refreshing twist. The possibilities are endless!
- Topping Ideas: Get creative with your toppings! Besides the chopped nuts, think about fresh fruit like berries, a drizzle of caramel or chocolate sauce, or even a sprinkle of shredded coconut. It’s all about what you love!
- Chill Time: Don’t rush the chilling process. I know waiting is hard, but allowing it to set for at least 4 hours (or even overnight) will give you the best texture and flavor!
With these tips in your back pocket, you’re all set to create an unforgettable Kunafa Chocolate Icebox Cake that will have everyone coming back for seconds. Happy baking!
Nutritional Information
Let’s talk about what you’re getting when you indulge in a slice of this delightful Kunafa Chocolate Icebox Cake! Here’s a breakdown of the typical nutritional values per slice:
- Calories: 350
- Fat: 22g
- Saturated Fat: 10g
- Unsaturated Fat: 8g
- Trans Fat: 0g
- Cholesterol: 60mg
- Sodium: 150mg
- Carbohydrates: 30g
- Fiber: 1g
- Sugar: 25g
- Protein: 4g
Keep in mind that these values can vary based on the specific ingredients you use. For instance, if you decide to swap out the cream cheese for a lighter version or use different toppings, you may see some changes in the nutritional content. But no matter how you slice it, this dessert is a wonderfully rich and satisfying treat that’s perfect for any sweet craving!
FAQ Section
Can I use a different type of pastry instead of Kunafa?
Absolutely! While Kunafa gives this cake its unique flavor and texture, you can substitute it with phyllo dough or even crushed graham crackers for a different twist. Just make sure to adjust the butter if you’re using a different base!
How long does the Kunafa Chocolate Icebox Cake last in the fridge?
Stored properly in an airtight container, this cake should last about 4-5 days in the fridge. But trust me, it’s so delicious that it’s likely to disappear much faster!
Can I make this cake ahead of time?
Yes, definitely! This Kunafa Chocolate Icebox Cake is perfect for making a day in advance. In fact, the flavors get even better after chilling overnight, so don’t hesitate to prepare it ahead of your special occasion!
What can I use as a topping besides nuts?
So many options! You can use fresh berries, a drizzle of caramel or chocolate sauce, or even a sprinkle of shredded coconut. Get creative and choose what you love most!
Is this dessert suitable for vegetarians?
Yes! This Kunafa Chocolate Icebox Cake is vegetarian-friendly, as it contains no meat or fish products. Just be sure to check your chocolate and cream cheese to ensure they align with your dietary preferences.
Storage & Reheating Instructions
Now that you’ve made this scrumptious Kunafa Chocolate Icebox Cake, you might be wondering how to keep it fresh for later. Don’t worry; I’ve got you covered!
First off, make sure to store any leftovers in an airtight container in the refrigerator. This will help maintain its creamy texture and delicious flavor. It should last about 4-5 days—if it lasts that long, that is! I recommend placing a piece of wax paper between the cake and the lid to avoid any condensation from ruining that perfect chocolate topping.
Now, as for reheating, here’s the good news: you don’t need to! This cake is best served chilled, and trust me, a cold slice on a warm day is just heavenly. However, if you do prefer it a bit softer, you can let it sit at room temperature for about 15-20 minutes before serving. This way, the filling can soften just a tad without losing that delightful coldness.
If you happen to have a portion that you want to freeze, you can absolutely do that too! Just wrap individual slices tightly in plastic wrap and then place them in a freezer-safe container. They’ll keep well for up to 2 months. When you’re ready to enjoy, simply thaw them in the fridge overnight. No need to refreeze or reheat—just slice and dig in!
With these storage tips, you can savor your Kunafa Chocolate Icebox Cake for days to come! Enjoy every last bite!
Call to Action
Now that you’ve created this amazing Kunafa Chocolate Icebox Cake, I’d love to hear what you think! Did it impress your friends and family? What toppings did you use? I always get excited to see how everyone makes it their own, so don’t be shy! Leave a comment below and share your experience with me. If you loved this recipe as much as I do, please consider rating it and sharing it with your friends. Let’s spread the joy of this delicious dessert together! Happy baking, and I can’t wait to read your stories!
Print
Kunafa Chocolate Icebox Cake: 7 Steps to Pure Delight
- Total Time: 4 hours 45 minutes
- Yield: 12 servings 1x
- Diet: Vegetarian
Description
An easy no-bake dessert combining the flavors of Kunafa and chocolate.
Ingredients
- 200g Kunafa pastry
- 100g unsalted butter, melted
- 400g cream cheese, softened
- 200g powdered sugar
- 300ml whipping cream
- 200g dark chocolate, melted
- 1 tsp vanilla extract
- 100g chopped nuts for topping
Instructions
- Preheat your oven to 180°C (350°F).
- Mix the Kunafa pastry with melted butter and press into the bottom of a springform pan.
- Bake for 10-12 minutes until golden brown, then let it cool.
- In a bowl, beat the cream cheese and powdered sugar until smooth.
- In another bowl, whip the cream until stiff peaks form, then fold into the cream cheese mixture.
- Add melted chocolate and vanilla extract, mixing until combined.
- Spread the chocolate mixture over the cooled Kunafa base.
- Chill in the refrigerator for at least 4 hours.
- Before serving, sprinkle with chopped nuts.
Notes
- Use store-bought Kunafa for convenience.
- Adjust sugar according to your taste.
- Ensure the chocolate is completely melted to avoid lumps.
- Prep Time: 30 minutes
- Cook Time: 15 minutes
- Category: Dessert
- Method: No-Bake
- Cuisine: Middle Eastern
Nutrition
- Serving Size: 1 slice
- Calories: 350
- Sugar: 25g
- Sodium: 150mg
- Fat: 22g
- Saturated Fat: 10g
- Unsaturated Fat: 8g
- Trans Fat: 0g
- Carbohydrates: 30g
- Fiber: 1g
- Protein: 4g
- Cholesterol: 60mg
Keywords: Kunafa Chocolate Icebox Cake, No-Bake Dessert, Middle Eastern Dessert


