

Halal Cheesecake Bites: 7 Heavenly Treats to Savor
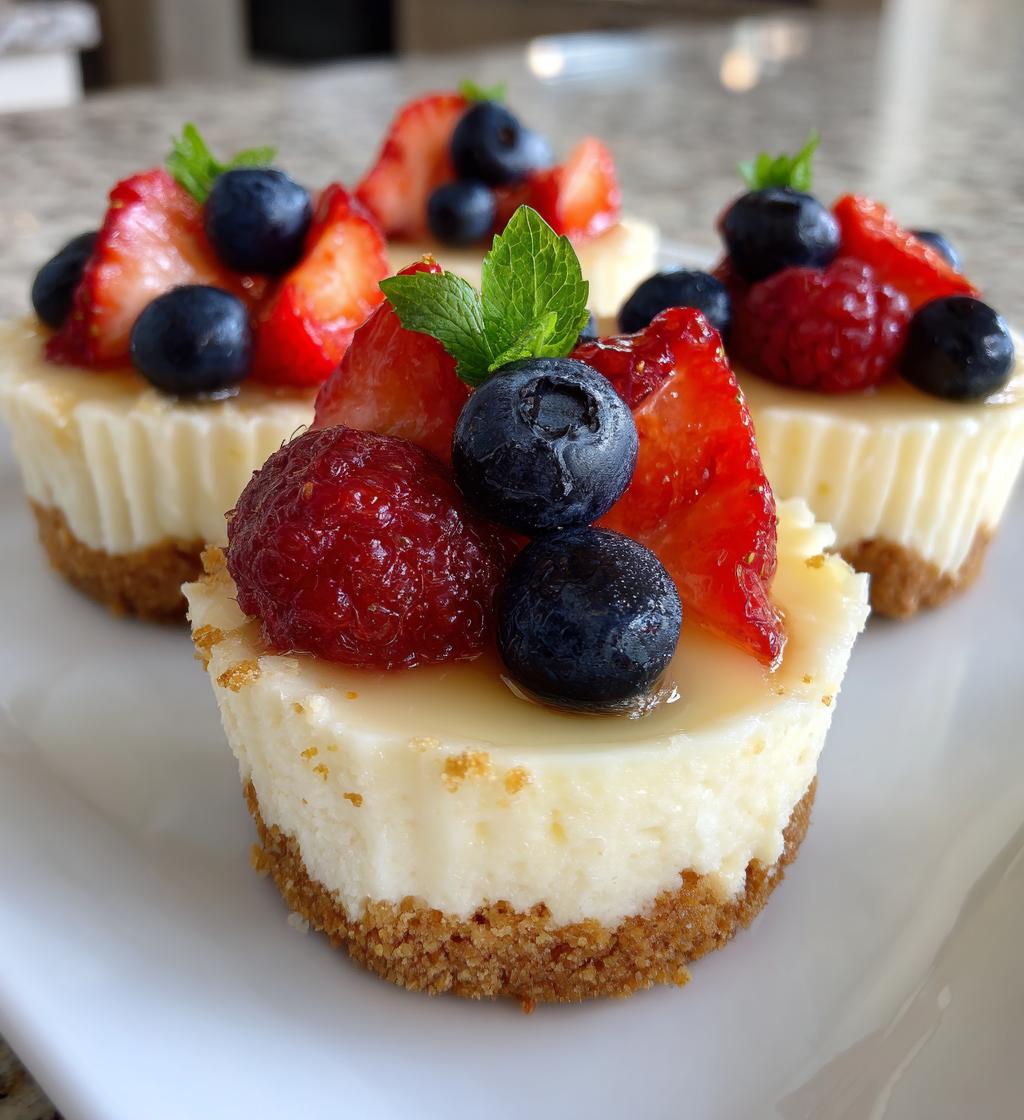
Oh my goodness, let me tell you about these Halal Cheesecake Bites! They’re absolutely delightful, and perfect for any occasion—whether it’s a family gathering, a potluck, or just a little treat for yourself after a long day. I remember the first time I made them; I was trying to impress some friends who were coming over, and they were a huge hit! The creamy filling paired with that crunchy graham cracker crust is just heavenly. Plus, they’re super easy to whip up, which is always a bonus in my book. Trust me, once you try these bites, you’ll wonder how you ever lived without them. They’re a fun twist on traditional cheesecake, and I just know you’re going to love them as much as I do!
Ingredients List
- 1 cup cream cheese, softened
- 1/2 cup granulated sugar
- 1 teaspoon vanilla extract
- 1 cup crushed graham crackers
- 1/2 cup unsalted butter, melted
- 1/4 cup powdered sugar
How to Prepare Halal Cheesecake Bites
Alright, let’s get into the fun part—making these scrumptious Halal Cheesecake Bites! It’s super simple, and I promise you’ll impress everyone with these little treats. Just follow these steps, and you’ll be on your way to cheesecake bliss!
Step 1: Preheat and Mix
First things first, you’ll want to preheat your oven to 350°F (175°C). This is key for getting that perfect bake! While that’s warming up, grab a bowl and mix together the cream cheese, granulated sugar, and vanilla extract. You want it to be super smooth and creamy, so don’t rush this part! A hand mixer works wonders here, but a whisk can do the trick, too—just put your back into it!
Step 2: Prepare the Crust
Now, let’s make that delicious crust! In another bowl, combine the crushed graham crackers with the melted butter. You’re looking for a mixture that’s moist but crumbly, almost like wet sand. Once you’ve got that texture, press it firmly into the bottom of your baking dish to form the crust. Make sure it’s evenly packed so it holds together beautifully when baked.
Step 3: Assemble and Bake
Spread that luscious cream cheese mixture over your crust, smoothing it out with a spatula. Now, pop it in the oven and let it bake for about 20 minutes. You want it to set just right—no jiggle, please! Keep an eye on it as it bakes; the smell will be heavenly, and you’ll be tempted to sneak a taste!
Step 4: Cooling and Serving
Once baked, remove the dish from the oven and let it cool at room temperature for a bit. Then, cover it and chill in the refrigerator for at least 2 hours. This step is crucial because it helps the flavors meld together and makes cutting them into bites a breeze. When you’re ready to serve, just slice them into small pieces—perfect for popping in your mouth and enjoying every creamy, dreamy bite!
Why You’ll Love This Recipe
- Quick and easy to make—perfect for last-minute gatherings!
- Deliciously creamy and rich, yet bite-sized for easy enjoyment.
- Minimal ingredients, so you can whip these up without a trip to the store.
- Versatile enough to customize with your favorite toppings, like fresh fruit or chocolate drizzle.
- Great for sharing—everyone loves a sweet little treat!
- Made with halal ingredients, making them suitable for everyone at your table.
- They look impressive, but are simple enough for beginner bakers to master.
Tips for Success
Alright, friends! Let’s make sure your Halal Cheesecake Bites turn out absolutely perfect. Here are some of my best tips to help you avoid any hiccups along the way:
- Room Temperature Cream Cheese: Make sure your cream cheese is at room temperature before mixing. This helps it blend smoothly and avoids any lumps. Trust me, nobody wants a bumpy cheesecake!
- Don’t Rush the Mixing: Take your time when mixing the cream cheese, sugar, and vanilla. You want a smooth and creamy texture, so beat it until it’s velvety! If you’ve got a hand mixer, it’s a game changer here.
- Even Crust Packing: When you’re pressing the graham cracker mixture into the baking dish, make sure it’s packed evenly and firmly. This keeps your crust from crumbling apart when you cut it. Think of it like making a sandcastle—firm and compact!
- Watch the Baking Time: Keep an eye on your bites as they bake. Every oven is a little different, so check for doneness around the 15-minute mark. You want them set but not overcooked—nobody likes a dry cheesecake!
- Chill, Chill, Chill: Don’t skip the chilling step! It’s essential for the flavors to meld and for the bites to firm up. Plus, they taste so much better cold. Just be patient and let them chill for at least 2 hours—good things come to those who wait!
- Experiment with Toppings: Get creative with toppings! Whether you drizzle chocolate, sprinkle some nuts, or add fresh fruit, it’s a great way to personalize your bites and impress your guests.
With these tips in your back pocket, you’ll be well on your way to making the most delicious Halal Cheesecake Bites! Happy baking!
Nutritional Information
Here’s a quick glance at the estimated nutritional data for each Halal Cheesecake Bite. Keep in mind that these values are based on traditional ingredients and can vary slightly depending on brands and specific measurements used:
- Serving Size: 1 bite
- Calories: 150
- Fat: 8g
- Saturated Fat: 5g
- Unsaturated Fat: 2g
- Trans Fat: 0g
- Cholesterol: 30mg
- Sodium: 120mg
- Carbohydrates: 18g
- Fiber: 1g
- Sugar: 10g
- Protein: 2g
These little bites are not just tasty; they’re a sweet treat you can enjoy without too much guilt. Just remember, moderation is key when indulging in these creamy delights!
FAQ Section
I get a lot of questions about these Halal Cheesecake Bites, so I thought I’d address some of the most common ones here. You might find just the answer you’re looking for!
Can I use a different type of crust?
Absolutely! While the graham cracker crust is a classic, you can use crushed cookies like Oreos for a chocolatey twist, or even a nut-based crust for a gluten-free option. Get creative!
How do I store leftovers?
Store any leftover Halal Cheesecake Bites in an airtight container in the refrigerator. They’ll stay fresh for up to 5 days, but trust me, they probably won’t last that long!
Can I freeze these bites?
Yes, you can! Just wrap each bite tightly in plastic wrap and place them in a freezer-safe container. They’ll keep well for up to 2 months. When you’re ready to enjoy, let them thaw in the fridge overnight.
What toppings do you recommend?
I love adding fresh fruit like strawberries or blueberries on top—they add a burst of color and flavor! You could also drizzle some chocolate or caramel sauce for an extra indulgent touch. The options are endless!
Can I make these bites dairy-free?
Yes! If you want to make them dairy-free, look for dairy-free cream cheese alternatives and ensure your butter is a plant-based option. It’s entirely possible to keep the flavors deliciously intact!
What’s the best way to cut these bites?
A sharp knife works best! Make sure to dip the knife in warm water and wipe it clean between cuts for nice, clean slices. This way, your bites will look as good as they taste!
Can I add flavors to the cream cheese mixture?
Definitely! You can mix in some lemon zest for a citrusy kick or even a bit of cocoa powder for a chocolate variation. Just remember to adjust the sugar accordingly if needed!
If you have any other questions, feel free to reach out! I’m here to help you make the best Halal Cheesecake Bites ever!
Storage & Reheating Instructions
Let’s talk about how to keep those delicious Halal Cheesecake Bites fresh and tasty! Proper storage is key to maintaining their creamy texture and delightful flavor.
First off, if you have any leftovers (though I doubt they’ll last long), store them in an airtight container in the refrigerator. They’ll stay fresh for up to 5 days—just be sure to keep them covered to avoid any fridge odors sneaking in!
Now, if you want to keep them longer, you can freeze these little gems! Just wrap each bite tightly in plastic wrap, and then place them in a freezer-safe container or a resealable freezer bag. They’ll be good for up to 2 months. When you’re ready to enjoy, just let them thaw in the fridge overnight. No need to reheat—serve them chilled for the best texture and flavor!
And remember, if you’ve topped your bites with fresh fruit, I recommend adding that just before serving to keep everything looking and tasting fresh. Enjoy your treats, and happy snacking!
Print
Halal Cheesecake Bites: 7 Heavenly Treats to Savor
- Total Time: 2 hours 40 minutes
- Yield: 16 bites 1x
- Diet: Halal
Description
Delicious Halal cheesecake bites perfect for any occasion.
Ingredients
- 1 cup cream cheese
- 1/2 cup sugar
- 1 teaspoon vanilla extract
- 1 cup crushed graham crackers
- 1/2 cup butter, melted
- 1/4 cup powdered sugar
Instructions
- Preheat your oven to 350°F (175°C).
- In a bowl, mix cream cheese, sugar, and vanilla extract until smooth.
- In another bowl, combine crushed graham crackers and melted butter.
- Press the graham cracker mixture into a baking dish to form a crust.
- Spread the cream cheese mixture over the crust.
- Bake for 20 minutes.
- Let it cool, then refrigerate for at least 2 hours before serving.
Notes
- Cut into small bites for easy serving.
- Top with fresh fruit if desired.
- Store leftovers in the fridge.
- Prep Time: 20 minutes
- Cook Time: 20 minutes
- Category: Dessert
- Method: Baking
- Cuisine: American
Nutrition
- Serving Size: 1 bite
- Calories: 150
- Sugar: 10g
- Sodium: 120mg
- Fat: 8g
- Saturated Fat: 5g
- Unsaturated Fat: 2g
- Trans Fat: 0g
- Carbohydrates: 18g
- Fiber: 1g
- Protein: 2g
- Cholesterol: 30mg
Keywords: Halal Cheesecake Bites


