

Crusty Italian Bread: 7 Secrets for Bakery-Style Perfection
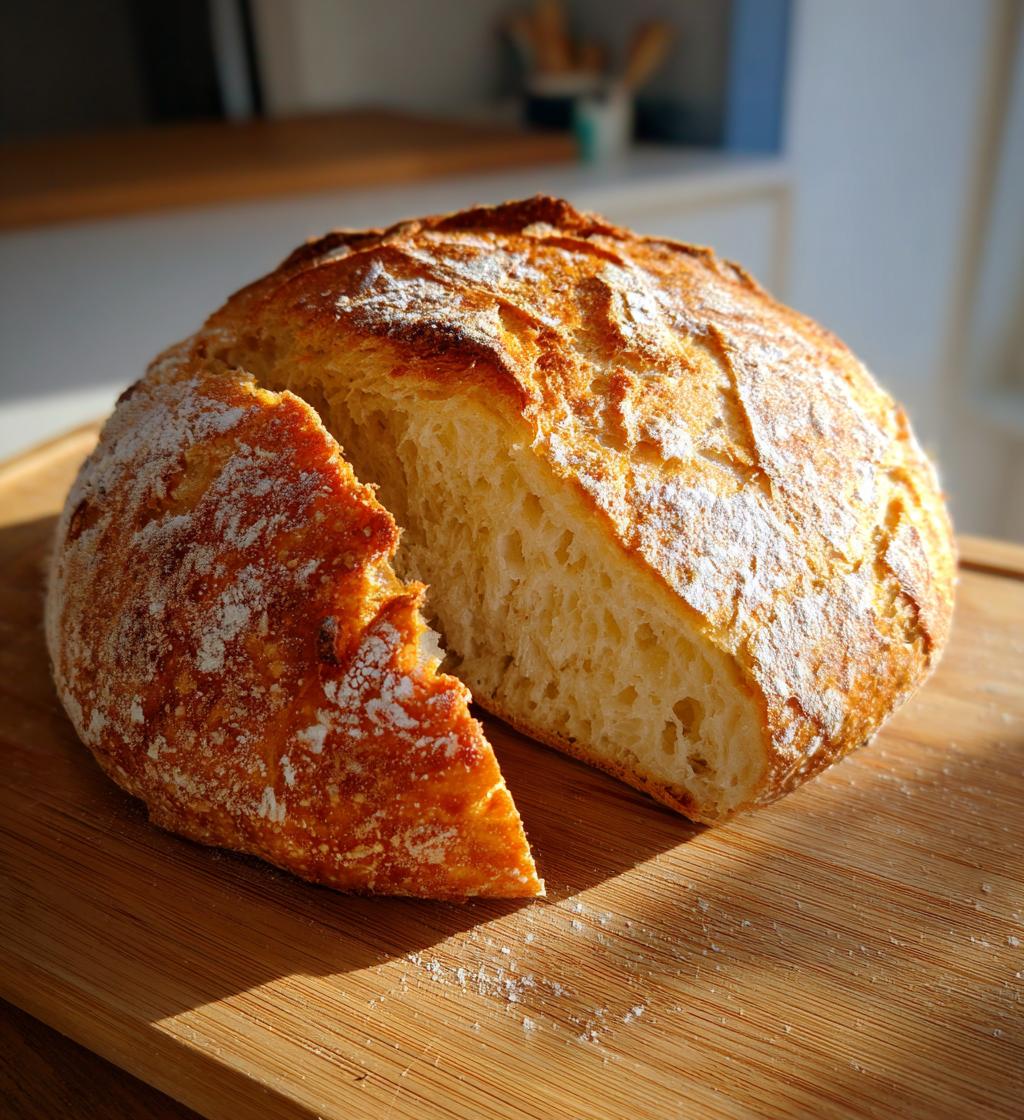
There’s just something magical about baking bread, isn’t there? The aroma of fresh dough rising in the oven fills the kitchen with warmth and invites everyone to gather around. When it comes to making Crusty Italian Bread, it’s like a cozy hug in the form of food! This recipe yields a stunning loaf with a golden, crunchy crust and a soft, pillowy interior that you can’t help but tear into. Trust me, there’s no better feeling than slicing into a freshly baked loaf, the steam wafting up and the first bite bringing a symphony of flavors. Whether you’re slathering it with butter, dipping it in olive oil, or using it for a hearty sandwich, this bread is sure to impress. Let’s roll up our sleeves and get started on this delightful baking adventure!
Ingredients for Crusty Italian Bread
(Tip: You’ll find the full list of ingredients and measurements in the recipe card below.)
- 4 cups all-purpose flour: This is the foundation of your bread, providing structure and that lovely chewy texture.
- 1 ½ cups warm water: Make sure it’s warm, not hot! This helps activate the yeast for a nice rise.
- 2 teaspoons salt: Essential for flavor—don’t skip it! It also strengthens the dough.
- 1 teaspoon sugar: Just a pinch to feed the yeast and help it wake up.
- 2 teaspoons active dry yeast: The magic ingredient that makes your bread rise and gives it that wonderful airy texture.
How to Prepare Crusty Italian Bread
Alright, let’s dive into the delightful process of making your very own Crusty Italian Bread! Don’t worry, I’ll guide you through each step, and before you know it, you’ll have a beautiful loaf that’s ready to be devoured. Just remember to take your time and enjoy the journey!
Step 1: Prepare the Yeast Mixture
First things first! In a bowl, mix together the warm water, sugar, and active dry yeast. Give it a gentle stir and then let it sit for about 5 minutes. This is super important because it allows the yeast to wake up and get bubbly. You should see some froth forming on top—this means your yeast is alive and kicking!
Step 2: Combine Ingredients
Now that your yeast is ready, it’s time to bring in the flour and salt. Add the flour and salt to the yeast mixture, and stir it all together until it’s combined. Don’t worry about getting it perfectly smooth at this stage; just make sure there are no dry bits of flour hiding in the bottom of the bowl.
Step 3: Knead the Dough
Time to get your hands into the dough! Turn it out onto a floured surface and knead it for about 10 minutes. You want to work that dough until it’s smooth and elastic. It should feel soft but not sticky. If it sticks to your hands, sprinkle a little more flour. Trust me, this is where the magic happens!
Step 4: First Rise
Once kneaded, place your dough into a greased bowl, turning it over so it’s coated lightly in oil. Cover the bowl with a clean kitchen towel and let it rise in a warm spot for about 1 hour. You want it to double in size, which is a great time to grab a cup of tea or coffee and just wait for that beautiful transformation!
Step 5: Shape the Loaf
After an hour, it’s time to punch down the dough—yes, really! This releases the air bubbles. Turn the dough out onto your floured surface again and shape it into a loaf. You can go for a classic oval shape or whatever feels right. Just make sure it’s nice and tight!
Step 6: Second Rise
Now, place your shaped loaf on a baking sheet lined with parchment paper. Cover it with that same kitchen towel and let it rise for another 30 minutes. It’s going to puff up nicely, and you’ll be so excited to see it come to life!
Step 7: Preheat the Oven
While your loaf is rising, go ahead and preheat your oven to 450°F (232°C). This is crucial because a hot oven is what’s going to give your bread that amazing crust. You want to make sure it’s nice and toasty when your dough is ready to go in!
Step 8: Score and Bake
Once your dough has risen again, it’s time for the final touches! Use a sharp knife to score the top of the loaf with a few slashes—this helps it expand while baking. Then, pop it into the preheated oven and bake for 25-30 minutes until it’s a gorgeous golden brown. The smell will be absolutely heavenly, and you’ll know you’re in for a treat!
Tips for Success
Before you dive into baking your Crusty Italian Bread, here are some of my tried-and-true tips that’ll help you nail this recipe every single time. Believe me, these little nuggets of wisdom can make all the difference!
- Use high-quality flour: It’s amazing how much of a difference good flour can make! Opt for unbleached all-purpose flour for the best texture.
- Check your yeast: If you’re unsure about the freshness of your yeast, do a quick test before using it. Mix it with warm water and sugar—if it bubbles up, you’re good to go!
- Watch the water temperature: Remember, you want warm water, not hot! If it feels too hot to the touch, let it cool down a bit. Too hot can kill the yeast!
- Don’t rush the rising: Be patient! The first and second rises are crucial for developing flavor and texture. If your kitchen is a bit chilly, it might take longer, so give it the time it needs.
- Steam for a crusty exterior: For that ultimate crust, place a shallow pan filled with water on the bottom rack of your oven while it preheats. The steam helps create that beautiful crust we all love!
- Let it cool: I know it’s tempting to slice into that hot loaf right out of the oven, but resist! Letting it cool completely helps the texture set, making for the perfect slice.
Following these tips will set you up for success and elevate your Crusty Italian Bread to bakery-level perfection. Enjoy the process and happy baking!
Nutritional Information
When you’re enjoying a slice of Crusty Italian Bread, it’s nice to know what you’re working with in terms of nutrition! Here’s the estimated nutritional data per serving (1 slice):
- Calories: 150
- Fat: 1g
- Saturated Fat: 0g
- Trans Fat: 0g
- Unsaturated Fat: 0g
- Cholesterol: 0mg
- Sodium: 200mg
- Carbohydrates: 30g
- Fiber: 1g
- Protein: 5g
- Sugar: 0g
Keep in mind that these values are estimates and can vary based on the specific ingredients you use. Enjoy every bite of your homemade goodness, knowing it’s not just delicious, but also a wholesome addition to your meal!
FAQ Section
Can I use whole wheat flour?
Absolutely! You can use whole wheat flour instead of all-purpose flour for a heartier loaf. Just keep in mind that whole wheat flour absorbs more liquid, so you might need to add a bit more warm water to your dough to achieve the right consistency. It’ll give your Crusty Italian Bread a lovely nutty flavor and extra nutrients, but remember, it may not rise as high as with all-purpose flour. Experiment and find what you love!
How do I store leftover bread?
To keep your Crusty Italian Bread fresh, store it in a paper bag at room temperature for a day or two. If you have more than you can eat, wrap it tightly in plastic wrap or aluminum foil and pop it in the freezer. Just remember to slice it first! That way, you can take out just what you need without thawing the whole loaf. When you’re ready to enjoy it, let it thaw at room temperature, or pop a slice in the toaster for that fresh-baked feel!
Why is my bread dense?
A dense loaf can be a bit of a bummer, but don’t worry, it happens to the best of us! This can occur for a few reasons: maybe the yeast wasn’t fresh, or it didn’t have enough time to rise. Also, if you added too much flour while kneading, that can weigh it down too. To avoid density, make sure your yeast is active, give your dough plenty of time to rise, and measure your flour accurately. With a little practice, you’ll be turning out perfect loaves in no time!
Why You’ll Love This Recipe
- Aromatic Experience: The smell of baking bread is simply unbeatable! Your kitchen will feel like a warm Italian bakery.
- Golden Crust: Enjoy a perfectly crusty exterior that crackles when you slice into it—just the way good bread should be!
- Soft Interior: The inside is soft and fluffy, making it perfect for sandwiches, toast, or simply slathered with butter.
- Simple Ingredients: You don’t need fancy ingredients—just basic pantry staples that you probably already have at home!
- Customizable: Feel free to add herbs, cheese, or garlic to the dough for a personalized twist on the classic recipe.
- Great for Sharing: There’s something special about breaking bread with loved ones. This loaf is perfect for gatherings or cozy dinners.
- Freezer-Friendly: You can easily freeze leftover bread to enjoy later, making it a wonderful make-ahead option.
- Accomplishing Feel: Baking your own bread is incredibly satisfying, and you’ll impress everyone with your homemade creation!
Equipment Needed
Before you get started on your Crusty Italian Bread, let’s make sure you have all the necessary tools at hand. Having the right equipment will make the process smoother and more enjoyable!
- Mixing bowl: A large bowl for mixing your ingredients and letting the dough rise.
- Measuring cups and spoons: Accurate measurements are key, so make sure you have these handy!
- Floured surface: A clean countertop or cutting board dusted with flour for kneading the dough.
- Kitchen towel: To cover the dough while it rises and keep it warm.
- Baking sheet: A flat surface to place your loaf on while it bakes—line it with parchment paper for easy cleanup!
- Sharp knife or bread lame: For scoring the top of the loaf, which helps it rise beautifully in the oven.
- Oven: A preheated oven set to 450°F (232°C) is essential for achieving that perfect crust.
- Wire rack: For cooling the bread after it’s baked, allowing air to circulate and prevent sogginess.
With these tools in your kitchen arsenal, you’ll be well-equipped to create a stunning loaf of Crusty Italian Bread that’ll have everyone asking for seconds!
Print
Crusty Italian Bread: 7 Secrets for Bakery-Style Perfection
- Total Time: 2 hours
- Yield: 1 loaf 1x
- Diet: Vegetarian
Description
A classic recipe for crusty Italian bread with a golden crust and soft interior.
Ingredients
- 4 cups all-purpose flour
- 1 ½ cups warm water
- 2 teaspoons salt
- 1 teaspoon sugar
- 2 teaspoons active dry yeast
Instructions
- In a bowl, mix warm water, sugar, and yeast. Let it sit for 5 minutes.
- Add flour and salt to the yeast mixture. Stir until combined.
- Knead the dough on a floured surface for about 10 minutes.
- Place the dough in a greased bowl. Cover and let it rise for 1 hour.
- Punch down the dough and shape it into a loaf.
- Let the loaf rise for another 30 minutes.
- Preheat the oven to 450°F (232°C).
- Score the top of the loaf and place it in the oven.
- Bake for 25-30 minutes until golden brown.
Notes
- For extra crust, place a pan of water in the oven while baking.
- Let the bread cool before slicing for the best texture.
- Prep Time: 1 hour 30 minutes
- Cook Time: 30 minutes
- Category: Bread
- Method: Baking
- Cuisine: Italian
Nutrition
- Serving Size: 1 slice
- Calories: 150
- Sugar: 0g
- Sodium: 200mg
- Fat: 1g
- Saturated Fat: 0g
- Unsaturated Fat: 0g
- Trans Fat: 0g
- Carbohydrates: 30g
- Fiber: 1g
- Protein: 5g
- Cholesterol: 0mg
Keywords: Crusty Italian Bread, Italian bread, homemade bread


