

Chicken Katsu: 5 Secrets to Crispy Perfection
Oh my goodness, let me tell you about Chicken Katsu! This crispy, golden delight is one of my absolute favorite Japanese dishes. The moment you bite into it, you get that satisfying crunch followed by tender, juicy chicken—just heavenly! I remember the first time I tried it at a little Japanese restaurant in my neighborhood. I was hooked after that first bite, and I knew I had to recreate it at home. The best part? It’s surprisingly easy to make, and you can whip it up in under 30 minutes! Trust me, once you try this Chicken Katsu with its tangy tonkatsu sauce, you’ll be dreaming about it long after the last bite. Now, let’s dive into making this deliciousness together!
Ingredients for Chicken Katsu
Gathering the right ingredients is crucial for making the best Chicken Katsu. Here’s what you’ll need:
- 2 boneless, skinless chicken breasts
- 1 cup all-purpose flour
- 2 large eggs (beaten)
- 2 cups panko breadcrumbs (for that perfect crunch!)
- Salt and pepper to taste
- Oil for frying (I like to use vegetable oil)
- Tonkatsu sauce for serving (this is the magic touch!)
Make sure to have everything ready before you start cooking. It makes the process so much smoother and more enjoyable! You’ll see how each ingredient plays a role in creating that fantastic flavor and texture. Let’s get cooking!
How to Prepare Chicken Katsu
Alright, let’s get down to the nitty-gritty of preparing this fabulous Chicken Katsu! I promise, once you get the hang of it, you’ll be whipping up this crispy goodness in no time. Follow along, and let’s make some magic happen!
Prepping the Chicken
First things first, we need to prep the chicken. Start by grabbing those lovely chicken breasts. I like to pound them gently to an even thickness—this helps them cook evenly and stay juicy. Season both sides generously with salt and pepper; don’t be shy! It’s where all the flavor starts. Next, set up your dredging station: a plate for flour, a bowl for the beaten eggs, and another plate for the panko breadcrumbs. Dredge each chicken breast in the flour, making sure to shake off any excess. Then, dip it into the egg, coating it well. Lastly, press it into the panko breadcrumbs—this is where the magic crunch comes from! Make sure it’s well coated; we want that fabulous texture!
Frying the Chicken
Now, let’s move on to frying! Heat up your oil in a deep pan to about 350°F (175°C). A good test to see if your oil is ready is to drop a tiny bit of panko in—if it sizzles, you’re good to go! Carefully place your breaded chicken into the hot oil, making sure not to overcrowd the pan. Fry each piece for about 3-4 minutes on one side until it’s golden brown, then flip and fry for another 3-4 minutes. Oh man, the smell is just incredible! Just a quick note: be cautious when working with hot oil; it can splatter, so keep a safe distance and use a splatter guard if you have one. Once they’re perfectly golden and cooked through, transfer the chicken to a plate lined with paper towels to drain any excess oil.
Serving Suggestions
Finally, let’s talk about serving! Slice your Chicken Katsu into strips, and don’t forget that tonkatsu sauce—it’s the star of the show! Drizzle it generously over the chicken or serve it on the side for dipping. For a classic presentation, you can serve it alongside some freshly shredded cabbage; it adds a nice crunch and balances out the richness of the chicken. You can even throw in a side of rice or pickled vegetables for a complete meal. Trust me, your taste buds will thank you!
Tips for Success
Alright, friends, here are my top tips to ensure your Chicken Katsu comes out perfectly every single time. Trust me, these little nuggets of wisdom will make all the difference!
- Temperature is key: Make sure your oil is hot enough before frying. If it’s too cool, your chicken will absorb the oil and become greasy. If it’s too hot, it can burn before cooking through. A perfect 350°F (175°C) is the sweet spot!
- Double coating: For an even crispier texture, consider double coating your chicken. After the first egg dip, let it rest for a minute, then dip it in egg again and coat it with panko once more. Extra crunch, extra yum!
- Don’t rush the frying: Fry in batches if you have to! Overcrowding the pan can drop the oil temperature, leading to soggy chicken. Give each piece enough space to get that gorgeous golden crust.
- Let it rest: After frying, let your Chicken Katsu rest on a paper towel for a minute or two. This helps to keep it crispy by allowing excess oil to drain off, and the chicken will settle into that perfect juicy texture!
- Experiment with sauces: While tonkatsu sauce is a classic, don’t be afraid to try other dipping sauces too! A little spicy mayo or even a sweet chili sauce can add a fun twist to this dish.
With these tips, you’ll be well on your way to making Chicken Katsu that impresses every time. Happy cooking!
Why You’ll Love This Recipe
Chicken Katsu isn’t just a meal; it’s a delightful experience that you’ll want to savor over and over again. Here’s why I absolutely love making this dish:
- Quick to prepare: With just 15 minutes of prep and 10 minutes of cooking, you can have a delicious meal on the table in under 30 minutes!
- Flavor-packed: The combination of crispy chicken and tangy tonkatsu sauce creates a flavor explosion that will make your taste buds dance.
- Customizable: You can easily tweak the recipe to your liking—try it with different sauces or sides to make it your own!
- Kid-friendly: Kids love the crunch and the flavor, making it a great choice for family dinners.
- Healthy option: Made with lean chicken and served with fresh veggies, it’s a satisfying meal that doesn’t skimp on nutrition.
- Perfect for meal prep: You can make a batch ahead of time, and it reheats beautifully for lunch or dinner later in the week.
Once you try this Chicken Katsu, I promise you’ll be hooked! It’s the kind of dish that brings joy to any table.
Nutritional Information
When it comes to enjoying Chicken Katsu, it’s always good to know what you’re putting on your plate. Here’s an estimated breakdown of the nutritional information for one serving of this delicious dish:
- Calories: 400
- Fat: 20g
- Saturated Fat: 4g
- Unsaturated Fat: 14g
- Trans Fat: 0g
- Cholesterol: 120mg
- Sodium: 800mg
- Carbohydrates: 40g
- Fiber: 2g
- Sugar: 2g
- Protein: 30g
Keep in mind that these values are estimates and can vary based on the specific ingredients and portion sizes you use. But it gives you a great idea of what to expect! Enjoy your Chicken Katsu guilt-free, knowing it’s packed with protein and deliciousness!
FAQ About Chicken Katsu
Got questions about making Chicken Katsu? Don’t worry, I’ve got you covered! Here are some common queries I hear from my fellow home cooks, along with my answers to help you along your culinary journey.
Can I use chicken thighs instead of breasts?
Absolutely! Chicken thighs will give you a juicier result, and they’re super flavorful. Just make sure to adjust the cooking time a bit since thighs can be thicker than breasts.
What is tonkatsu sauce, and can I make it at home?
Tonkatsu sauce is a tangy, slightly sweet sauce that pairs perfectly with Chicken Katsu. You can definitely make it at home using ketchup, Worcestershire sauce, soy sauce, and a bit of sugar. Mix it all together and you’re good to go!
Can I make this dish gluten-free?
Yes! Just substitute the all-purpose flour with a gluten-free flour blend and ensure your panko breadcrumbs are gluten-free as well. It’ll taste just as delicious!
How do I know when the chicken is cooked through?
The best way to check is to use a meat thermometer. The internal temperature should reach 165°F (74°C). If you don’t have a thermometer, make sure the juices run clear when you cut into the chicken.
Can I prepare Chicken Katsu ahead of time?
Yes, you can bread the chicken ahead of time and store it in the fridge until you’re ready to fry. Just make sure to cover it well to prevent it from drying out!
What sides go well with Chicken Katsu?
Oh, there are so many options! I love serving it with shredded cabbage, rice, or even a simple cucumber salad. Pickled vegetables are also a fantastic traditional side!
Can I freeze leftover Chicken Katsu?
Yes, you can! Just make sure to let it cool completely, then wrap it tightly in plastic wrap and store it in an airtight container. It should be good for about a month. To reheat, just pop it in the oven to regain that crispy texture!
Hopefully, that clears up any questions you had about Chicken Katsu! If you’ve got more, feel free to ask. Happy cooking!
Storage & Reheating Instructions
Now, let’s talk about how to properly store that delicious Chicken Katsu you’ve made! If you happen to have leftovers (which is rare because it’s so good!), you want to make sure they stay fresh and tasty. Here’s how to do it:
- Cooling: First, let your Chicken Katsu cool completely before storing it. This helps prevent condensation, which can make it soggy.
- Storage: Once cooled, wrap each piece tightly in plastic wrap or place it in an airtight container. It’s best to store it in the refrigerator if you plan to eat it within a few days. It should last about 2-3 days in the fridge.
- Freezing: If you want to keep it longer, you can freeze the Chicken Katsu! Just make sure it’s well wrapped to avoid freezer burn. It should be good for about a month in the freezer.
When you’re ready to enjoy your leftovers, reheating is key to keeping that crispy texture. Here’s how to do it:
- Oven Method: Preheat your oven to 375°F (190°C). Place the chicken on a baking sheet lined with parchment paper and heat for about 10-15 minutes, or until heated through and crispy. This method works wonders!
- Air Fryer Method: If you have an air fryer, this is my favorite way to reheat! Set it to 350°F (175°C) and air fry for about 5-7 minutes. It’ll come out just as crispy as the first time!
- Microwave Method (not preferred): If you’re in a hurry, you can microwave it for about 30 seconds to 1 minute, but keep in mind it won’t be crispy. I only recommend this as a last resort!
With these tips, you can enjoy your Chicken Katsu again without sacrificing that delicious crunch. Happy eating!
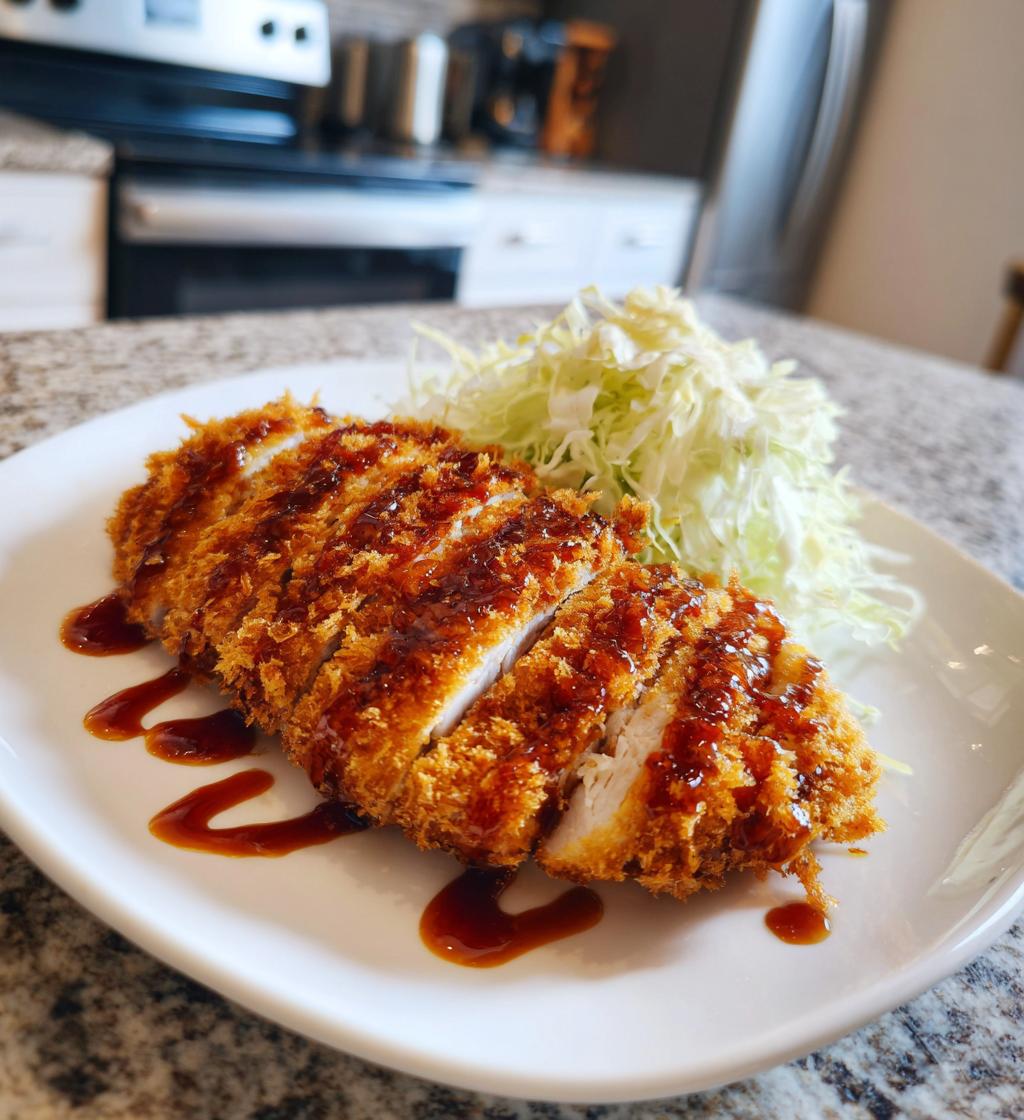
Chicken recipes are always a hit, and with these tips, you’ll be well on your way to making Chicken Katsu that impresses every time. Happy cooking!

Chicken Katsu: 5 Secrets to Crispy Perfection
- Total Time: 25 minutes
- Yield: 2 servings 1x
- Diet: Gluten Free
Description
Chicken Katsu is a Japanese dish featuring breaded and deep-fried chicken cutlets served with a tangy sauce.
Ingredients
- 2 boneless, skinless chicken breasts
- 1 cup flour
- 2 eggs
- 2 cups panko breadcrumbs
- Salt and pepper to taste
- Oil for frying
- Tonakatsu sauce for serving
Instructions
- Preheat oil in a deep pan to 350°F (175°C).
- Season chicken breasts with salt and pepper.
- Dredge each chicken breast in flour, shaking off excess.
- Dip in beaten eggs, coating well.
- Coat with panko breadcrumbs, pressing to adhere.
- Carefully place chicken in hot oil and fry until golden brown, about 3-4 minutes per side.
- Remove from oil and drain on paper towels.
- Slice and serve with tonkatsu sauce.
Notes
- For a crispier texture, double coat with egg and panko.
- Serve with shredded cabbage for a traditional side.
- Prep Time: 15 minutes
- Cook Time: 10 minutes
- Category: Main Course
- Method: Frying
- Cuisine: Japanese
Nutrition
- Serving Size: 1 piece
- Calories: 400
- Sugar: 2g
- Sodium: 800mg
- Fat: 20g
- Saturated Fat: 4g
- Unsaturated Fat: 14g
- Trans Fat: 0g
- Carbohydrates: 40g
- Fiber: 2g
- Protein: 30g
- Cholesterol: 120mg
Keywords: Chicken Katsu, Japanese Chicken Dish, Breaded Chicken


